Introduction
A SSG is an application that combines templates and plaintext content into HTML that can then be uploaded to a web server hosting location. The output HTML is static meaning there is little to no interaction that requires a back-end in order for the site to function. There are many benefits to this approach. SEO, security, low maintenance, and content re-use are just a few examples of the benefits. Since there is no back-end required, your hosting costs are also greatly reduced and your hosting options are greatly expanded.
There are many SSGs available to choose from. Each of them use a different templating format. Each of them deal with styles differently. Some may compile the SCSS / Sass for you, others expect you to use a complete CSS file. Some use "pure" Markdown for the content while others may use some subset of Markdown. It's really a "choose what you're comfortable with" situation. Today, I'm going to focus on Zola.
Presenting Zola
Zola is an SSG that is built with Rust, uses CommonMark for content, Tera for in-template functions and, optionally, SCSS for stylesheet compilation. You create your content using CommonMark, your templates using HTML chunks and Tera functions / variables and your stylesheet however you want. Then simply run a single command from the terminal and Zola combines your markdown with template files and stylesheets into publishable HTML files. Upload those files to a web server and that's it. You have a published website.
Obviously it's bit more complex than that, but those are the basic steps. The key take-away from this is that everything is static. There are zero interactive components, no server or back-end to build. It's just basic HTML and CSS - the way the web was intended.
NOTE: Interactivity is possible if you include Javascript in your templates. I will most likely cover this in more detail later.
For now, all we need to do is go to the Zola installation page and follow the instructions for our operating system. Since I use Arch, btw™, I'm going to follow the instructions for Arch Linux. After installing, you should now have a zola command available from the terminal. If you type zola -h, you should be presented with a list of command options available.
A fast static site generator with everything built-in

Usage: zola [OPTIONS] <COMMAND>

Commands:
  init        Create a new Zola project
  build       Deletes the output directory if there is one and builds the site
  serve       Serve the site. Rebuild and reload on change automatically
  check       Try to build the project without rendering it. Checks links
  completion  Generate shell completion
  help        Print this message or the help of the given subcommand(s)

Options:
  -r, --root <ROOT>      Directory to use as root of project [default: .]
  -c, --config <CONFIG>  Path to a config file other than config.toml in the root of project [default: config.toml]
  -h, --help             Print help
  -V, --version          Print version
As long as your output looks like the example above, you are ready to go.
Now that we have zola installed and working, it's time to create the directory that will hold our site. After creating this directory, we will cd into it and run zola init. I will be using a directory named zola-example in my personal projects directory.
NOTE: If you want to track your changes using git, be sure to run git init in the project directory first.
.../Personal ❱ mkdir zola-example
.../Personal ❱ cd zola-example/
.../Personal/zola-example ❱ zola init
Welcome to Zola!
Please answer a few questions to get started quickly.
Any choices made can be changed by modifying the `config.toml` file later.
> What is the URL of your site? (https://example.com):
> Do you want to enable Sass compilation? [Y/n]:
> Do you want to enable syntax highlighting? [y/N]:
> Do you want to build a search index of the content? [y/N]:

Done! Your site was created in .../Personal/zola-example

Get started by moving into the directory and using the built-in server: `zola serve`
Visit https://www.getzola.org for the full documentation.
From this point forward, all paths referenced are relative to the zola project directory unless otherwise specified.
Let's take a look at what Zola created for us and provide a little more detail.
| Name | Type | Description |
|---|---|---|
| content | Directory | This is the directory where all your markdown files will go. These files will be converted to HTML by Zola. |
| sass | Directory | This is where your SCSS files will go. These files will be built by Zola during a build or serve command. |
| static | Directory | This is for static content. Zola will copy the contents of this directory over to your static site's public directory. |
| templates | Directory | This is where your HTML templates will reside. |
| themes | Directory | This is where you can install Zola themes to. You can then make changes to your config.toml file to use a particular theme. |
| config.toml | File | The configuration file used by Zola's CLI. It describes how to parse and build your site. |
NOTE: The sass directory is only used if you chose "Y" (which is the default) to "Do you want to enable Sass compilation?". If you chose "N" or later turn it off in your config.toml, Zola will not build Sass styles and you will have to create CSS the old fashioned way.
The "config.toml" file
This TOML (TOML spec) file controls how Zola behaves during a serve or build operation. You can have Zola create RSS feeds of your content. It can create sub-category pages, pages based on tags, pages translated into different languages and much more. All of that is controlled by this configuration file. I'll just touch on the basic stuff that is automatically generated. There's an entire rabbit hole to go down on Zola's configuration page. First, here's a look at the default config.toml you will end up with at the end of the zola init command.
# The URL the site will be built for
base_url = "https://example.com"

# Whether to automatically compile all Sass files in the sass directory
compile_sass = true

# Whether to build a search index to be used later on by a JavaScript library
build_search_index = false

[markdown]
# Whether to do syntax highlighting
# Theme can be customised by setting the `highlight_theme` variable to a theme supported by Zola
highlight_code = false

[extra]
# Put all your custom variables here
NOTE: The only property that is required in the config.toml is the base_url property. All other properties will use the defaults described in Zola's configuration page.
This file is pretty well documented by itself, but let's elaborate a little more on these options.
- The 'base_url' property
- This is the URL of the site that Zola will build for. Elsewhere in the configuration, you can tell Zola how to treat all external links. For example forcing all external links to open in a new tab, or turn on
rel="nofollow"ornoreferrer. By default, these are set to false. Knowing the base URL allows Zola to scan for URLs that don't point to a resource at thebase_urland attach the appropriate attributes if they don't already exist. - The 'compile_sass' property
- This triggers a compilation of SCSS files in the
sassdirectory. You will need to adhere to SCSS rules for file naming, import paths, etc. Any final css files are copied to the ephemeralpublicdirectory when you run zola with eitherserveorbuild. - The 'build_search_index' property
- When this is set to
true, Zola will create a searchable index file and inject aelasticlunr.min.jsfile into yourpublicdirectory. This Javascript file contains the functions needed to read the search index file so you can provide a "localized" search capability on your site. - The 'highlight_code' property
- This enables or disables syntax highlighting when Zola renders entire code blocks. In markdown, this is accomplished by beginning and ending any code block with three backticks. You'll also notice that this property comes after the
[markdown]heading.
NOTE: There are many headings similar to the [markdown] heading available in the config.toml and you can learn more about them on Zola's configuration page. Suffice it to say that these headings have an important role. Certain properties are only used if they appear within the heading section they belong to. If we were to place the highlight_code property above the [markdown] heading or even under the [extra] heading, Zola would not apply the syntax highlighting.
Content file structure
Before we get too far ahead of ourselves, we should take a look at the structure of a typical content markdown file. There are, in essence, two parts to the markdown file structure for Zola - the frontmatter section and the content section.
The frontmatter section
The frontmatter contains metadata about the content file that can be used inside the page templates or by Zola itself during the build of the site. Things like the title of the page, the date the page was created, tags, categories and other metadata are just a few examples. The frontmatter must always be the first thing in a content file. We use three plus signs above and below the frontmatter block. Within the frontmatter block, properties are defined using standard TOML notation. Below is an example of a frontmatter block.
+++
title = "Example page title"
date = 2024-03-11
description = "An example of a page description"
[taxonomies]
tags = ["web", "html", "css"]
categories = ["nerd-stuff"]
+++
NOTE: For more details regarding what values are permitted here, take a look at Zola's Page Frontmatter documentation.
Take note of the +++ above and below the frontmatter. Supposedly one may use YAML for the frontmatter. In which case, the documentation says to replace the +++ with ---. Either way, Zola will expect to see one or the other as the very first thing in the file.
Between the +++ fence, we have some interesting information. The title, date and description are all main level or page properties. The values under the [taxonomies] heading are arrays of values and are accessible from the page.taxonomies object. More on what this means when we discuss templates.
The important things to take away from this is that frontmatter must exist for all markdown content files and they are read by Zola into variables that can be used within templates. The documentation for the Page Frontmatter object provides an in depth examination on the full set of available frontmatter properties.
NOTE: Regarding the tags and categories properties - both may contain as many entries as required. Tags are ways to identify specific topics covered by an article you wrote. Categories are the core segments of your site. Think of it like a newspaper. There's a sports section, a business section, a fashion section, etc. Those sections would fall under the categories scope. Within the business section, for example, you might have many different articles across multiple issues of your newspaper that are specific to the SEC or the stock market. Those would be the tags. Putting it all together using our newspaper analogy, we might expect to see something like:
+++
... # all the other stuff like title, etc.
[taxonomies]
tags = ["SEC", "NYSE", "stock exchange"]
categories = ["business"]
+++
The content section
This is actually the easiest part to explain. Simply put, it is the content of the site in CommonMark, a specific implementation of MarkDown. If you know markdown already, then you should not have any problems here. If you don't already know markdown, I recommend visiting the Markdown site and getting familiar with it. A handy resource to have up as a quick reference is the Markdown Cheatsheet.
Now that we know what goes into a content file...
Let's start making content
For the purpose of experimentation, we'll start by creating two content files to work with. Both files will go into the content/blog directory. The blog directory doesn't exist yet, so go ahead and create that directory under content now.
With the blog directory set up, let's create the two files. One will be named _index.md and the other will be named my-first-post.md. We will start with the my-first-post.md.
+++
title = "My first post"
date = 2024-03-11
description = "This is my first blog post in Zola"
+++

# Hello, world!

This is the first paragraph in my first blog post using Zola. It was actually pretty easy.
We have a simple frontmatter section with a title, date and description. We follow the frontmatter block with simple markdown that creates an h1 with "Hello, world!" as the text which is followed by a simple paragraph. There are more options for a page level frontmatter block. See Zola's documentation for Pages.
The directory and filename (excluding the '.md' extension) path under content is the URL path. If you have a system path of content/articles/some-crazy-ai-tricks.md, then the path to that post will be http://{site domain}/articles/some-crazy-ai-tricks. For our example, this content will be available at http://localhost:1111/blog/my-first-post.
Next, we'll create the _index.md file.
+++
title = "List of blog posts"
sort_by = "date"
+++
This is the minimum necessary data in _index.md. We provide a title that is used on the page and tell Zola to sort all blog posts by date. For more options, see Zola's documentation for Sections.
The _index.md will act as the sort of "index.html" within the blog section and provide Zola some guidance on how to list your posts inside the blog directory.
NOTE: The index files all begin with an underscore. These is used by Zola for both metadata about the section and for section level "index.html"-like content. This last point will be a separate topic later.
Now, we can run zola serve inside the root directory of our project, Zola will spin itself up in "watch" mode and hot-rebuild / reload anytime there are changes to the project. If we open a browser and load the site http://127.0.0.1:1111 we should see the following:
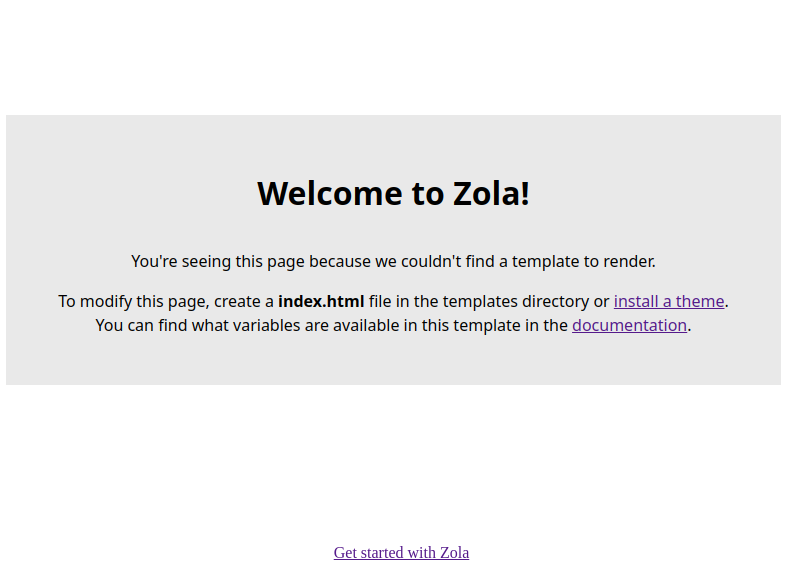
Don't panic. This is expected. When Zola is started up, it expects template files to be available in order to "compile" the content into a valid HTML. When there is no appropriate template file for a particular type of content (Section or Page), Zola will provide us with a helpful message about which files or templates to create.
Time to make the templates
When we run Zola in serve or build mode, it will read through the content directory and all sub directories. For each markdown file it finds, it will attempt to convert the markdown into HTML and inject that HTML into an appropriate or specified template file.
Looking at the output from zola serve, we can see that Zola is expecting some things in the templates directory. We are also given a few links to "install a theme" and reference to the template documentation. We'll start it simple. Let's create a base.html file in our template directory. Borrowing the example from Zola's "getting started" documentation, this file might look something like this:
<!DOCTYPE html>
<html lang="en">

<head>
  <meta charset="utf-8">
  <title>My Blog</title>
</head>

<body>
  <section class="section">
    <div class="container">
      {% block content %} {% endblock %}
    </div>
  </section>
</body>

</html>
You will notice that this looks like regular HTML with the exception of the {% block content %} {% endblock %} portion. This identifies the area within the HTML where we want Zola to inject some content. These sections are referred to as content blocks. They must be named and there can be multiple content blocks in our template. In the case of the template above, we have a content block named content. This sets aside a variable content for Zola to use for storing injectable data and passing this data between templates as they are injected. There's a lot more to this voodoo, but suffice it to say that this process allows for the creation of some extremely flexible and reusable templates.
If we take a look now, we will get the same page. That's because we don't yet have an index.html file in our templates directory. Let's create that now. Again, we will just borrow from Zola's examples.
{% extends "base.html" %}

{% block content %}
<h1 class="title">
  This is my blog made with Zola.
</h1>
{% endblock content %}
Let's break down what we have going on in this template.
- {% extends "base.html" %}
- This tells Zola that this template should be used together with the `base.html` template file.
- {% block content %}
- Similar to what we have in the `base.html` file with the difference being that what follows is a chunk of valid HTML. We are telling Zola to add this chunk of HTML to the `content` block variable.
- {% endblock content %}
- This indicates to Zola that we have reached the end of the `content` block data that needs to be added.
Taking all of that into account, Zola will first load the base.html file into memory, flagging any content blocks for places to inject content. Then it will load the content inside the {% block content %} section in the index.html and store that in a variable called content. It will continue to load any additional templates and data from the markdown into appropriate variables for the content blocks before finally injecting all the block variable data into the appropriate templates. Then it will compile the whole mess down to a single HTML file. Then end result, as seen by the browser will look something like:
<!DOCTYPE html>
<html lang="en">

<head>
  <meta charset="utf-8">
  <title>MyBlog</title>
</head>

<body>
  <section class="section">
    <div class="container">
      <h1 class="title">
        This is my blog made with Zola.
      </h1>
    </div>
  </section>
</body>

</html>
Above you can see that we have all of the content from the base.html template and the content block data from the index.html file combined and the {% block ... %} statements have been replaced accordingly. If we reload the page, we should see the following:

Hooray! Now what about the "My first post" and "List of blog posts" markdown files we created? We need to create template files for those to be useful. If you try going to /blog or /blog/my-first-post on your local Zola server, you won't see anything except the default Zola message telling you which template file needs to be created for each of those URLs. The /blog URL will expect a section.html file in templates and the /blog/my-first-post URL will expect a page.html file in templates. Let's create those now.
{% extends "base.html" %}

{% block content %}
<h1 class="title">
  {{ section.title }}
</h1>
<ul>
  <!-- If you are using pagination, section.pages will be empty. You need to use the paginator object -->
  {% for page in section.pages %}
  <li><a href="{{ page.permalink | safe }}">{{ page.title }}</a></li>
  {% endfor %}
</ul>
{% endblock content %}
This template is applied to all _index.md files under content. Zola considers each directory under content as a section and will expect to find an _index.md file. It will merge the HTML generated by the markdown content and the templates/section.html.
Looking at the template, we see that this template extends the base.html. We also see that it has a content block named content, the same as the base.html. Next, we see something new - {{ section.title }}. If we go back and look at the _index.md we created earlier, we will see in the frontmatter a title = "List of blog posts". When Zola loads the _index.md, it parses the frontmatter into usable variables that we can inject into our templates. Since _index.md files indicate a section, Zola adds the properties of the frontmatter to a section object and we can reference each variable with dot notation.
As we continue through the template, we see our next new thing - {% for page in section.pages %}. This is an iteration block provided by Tera. As the frontmatter is parsed, Zola also "catalogs" the rest of the current content directory for some additional data. One of these additional pieces of data is the section.pages property. This is an array of all Zola page objects in the current content directory. The for / endfor block provided by Tera allows us to iterate through each item in the section.pages array and assign each to a page variable that we can use within this iterator block. For more information about all properties available in the section object, check the Zola Documentation regarding Sections.
As we loop through each page of the section.pages property, the template will inject an <li> wrapped anchor tag with a URL-safe link to the page as the href and the page.title property as the link text. It is important to note, that the page returned from the section.pages array is a parsed Zola Page object and gives us access to all the properties in the frontmatter of that page.
Up next, let's render the actual blog post we created.
{% extends "base.html" %}

{% block content %}
<h1 class="title">
  {{ page.title }}
</h1>
<p class="subtitle"><strong>{{ page.date }}</strong></p>
{{ page.content | safe }}
{% endblock content %}
Any markdown file that is not named _index.md under the content directory is treated as a page and gets the page.html template applied to it unless a different template is assigned in the page's frontmatter.
Picking our page.html template apart, we see that just like all the other templates we've created so far, this one also extends the base.html and includes a content block named content. Here Zola gives us access to the frontmatter and other properties of the page in the page object. Like the section object's section.pages array, the page object has a number of similar properties available that may not be part of the frontmatter. For more details on this, see the Zola Documentation regarding Pages.
Having saved those template files, Zola should reload. If we go to http://127.0.0.1:1111/blog, we should see:

And if we click on the "My first post" link, the browser address should update to "http://127.0.0.1:1111/blog/my-first-post" and we should see:
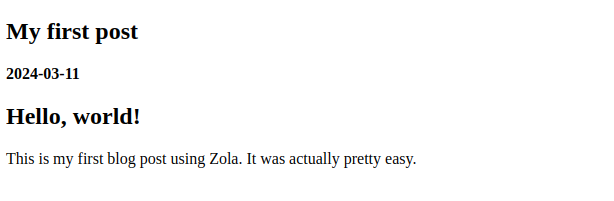
And there you have it. You've just created a static site using Zola. Outside of reading the documentation, either this page or Zola's official docs, the whole process should have taken only a few minutes. Granted, this is a very, very basic site lacking the pizazz that only some really nice CSS can provide. At least we have the basic building blocks to operate from. Maybe I'll diver deeper into the templates in the next post.
Wrapping up
In the world of SSGs, Zola is just another offering with it's own spin on things. The fact that it's built with Rust makes it kinda special and it certainly feels snappy when building a rather large site. But at the end of the day, it's still just one of many SSGs available. As I said before, the world of SSGs is a "choose what you're comfortable with" realm with more than a bunch of options available. I've played with a few in the past and they've all done the one thing I needed them to do and did it well... Just make HTML out of some other stuff.
On a personal note, I will say that I prefer the template features provided by Tera more than some other SSGs I've worked with. It just tries to get out of the way as much as a template engine can, I feel. For now, I think I'm going to stick with Zola.
Catch you later!